Frequently Asked Procedures
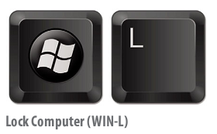
This function will lock your entire screen. This is an important practice for any time you step away from your desk to hide sensitive information. To log back in, simply input your network credentials (same password you use to log on to your work station in the morning).
Customize your Search/Sorting Options
The default for sorting is usually by the first column in your list. To change this so you can search/sort by another column, click on the column heading of the column you wish to sort/search on. A black triangle will appear inside the column heading you are now sorting on.
Class/Homeroom Student Lists
Class Roster (Multiple)
School View > Schedule top tab > Master (or) Sections side tab > Reports > BC Class Lists > BC Class list w. Grid
School View > Schedule top tab > Master (or) Sections side tab > Reports > BC Class Lists > BC Class list w. Grid
Class Roster (Individual Classes)
School view > Schedule top tab > Master side tab > Check the box beside the course (class) you wish to view > Click the Roster leaf.
You can use the Quick Print option to print this class list by using the Quick Print icon on the blue menu bar.
School view > Schedule top tab > Master side tab > Check the box beside the course (class) you wish to view > Click the Roster leaf.
You can use the Quick Print option to print this class list by using the Quick Print icon on the blue menu bar.
Class List with Ministry Designation
School View > Schedule top tab > Master (or) Sections side tab > Reports > BC Class Lists > BC Class list w. Desig
School View > Schedule top tab > Master (or) Sections side tab > Reports > BC Class Lists > BC Class list w. Desig
Homeroom Student List with Ministry Designation
School view > Schedule top tab > Master/Sections side tab > BC Class Lists > BC Homeroom List w. Desig
School view > Schedule top tab > Master/Sections side tab > BC Class Lists > BC Homeroom List w. Desig
Homeroom Student List with Column Headings
School view > Student top tab > Reports > BC Homeroom Student List w. Grid
School view > Student top tab > Reports > BC Homeroom Student List w. Grid
Emergency Contact List (short version) with Homeroom List/Snapshot
By Homeroom:
Change your Filter to Homeroom = ? > Type in the homeroom number > Change your Field Set to Emergency Contacts with Type > Click the Quick Print icon > Choose your desired format for printing
By Snapshot:
Change your Filter to your Snapshot (would have to save your Snapshot as a Filter) > Type in the homeroom number > Change your Field Set to Emergency Contacts with Type > Click the Quick Print icon > Choose your desired format for printing
Adding a Secondary Teacher (Co-Teach/Job Share)
Adding a Second Teacher to a Homeroom
From the School view, go to the Staff top tab > click on the teacher name of the secondary teacher you wish to add to a class > add the Homeroom number to the Homeroom field. Click Save.
Adding a Second Teacher to an Existing Class
From the School view > Schedule top tab > Master side tab (which takes you into the Sections sub-side tab), click on the Primary Staff > Name column heading to sort/group by Homeroom Teacher > Search for the primary teacher using CTRL+F or the search bar > check the box(es) beside the course you'd like to attach your second teacher to (Elementary = all courses for that teacher), go to Options > Show Selected then click on the Teacher leaf.
From here, go to Options > Add, using the magnifying glass, select your teacher Name > select the magnifying glass for Schedule Term > Code = FY (Full Year) > Role = Co-Teach > Gradebook access? = Check the box. Click Save. If you are adding a Co-Teacher to multiple classes, since you have your classes in Show Selected, you can click on the Next Record arrow in the Record Navigation pane (this will take you to the next class - please carefully verify you're adding to the right course!)
Reports
Report for a Snapshot (Team/Group) with additional columns for Class/Attendance entry
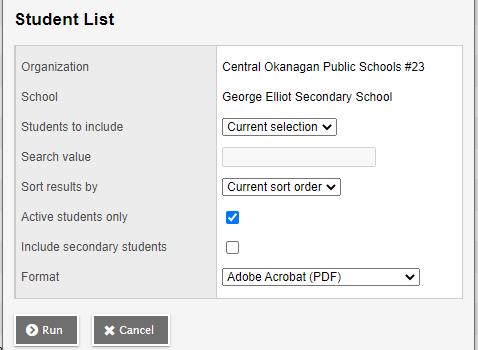
School View > Student top tab > Bring up your selection of students (choose Snapshot or Custom Selection) > Reports > Other Jurisdiction > Student List.
School View > Student top tab > Bring up your selection of students (choose Snapshot or Custom Selection) > Reports > Other Jurisdiction > Student List.
Snapshots
Adding a Student to an Existing Snapshot (team or group)
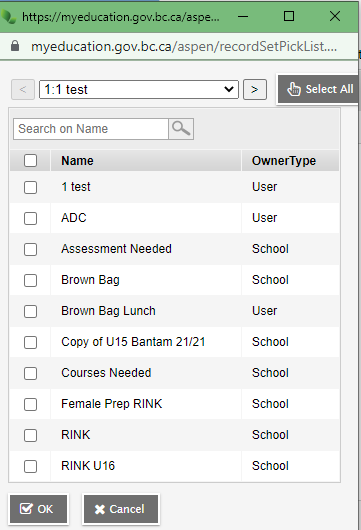
From the Student top tab, check the box beside the student name, then click on the Snapshot side tab. Once you are in the student's snapshots, go to Options > Add, select the desired snapshot you wish to add to the student then click OK. The student has now been added to that existing snapshot.
From the Student top tab, check the box beside the student name, then click on the Snapshot side tab. Once you are in the student's snapshots, go to Options > Add, select the desired snapshot you wish to add to the student then click OK. The student has now been added to that existing snapshot.


